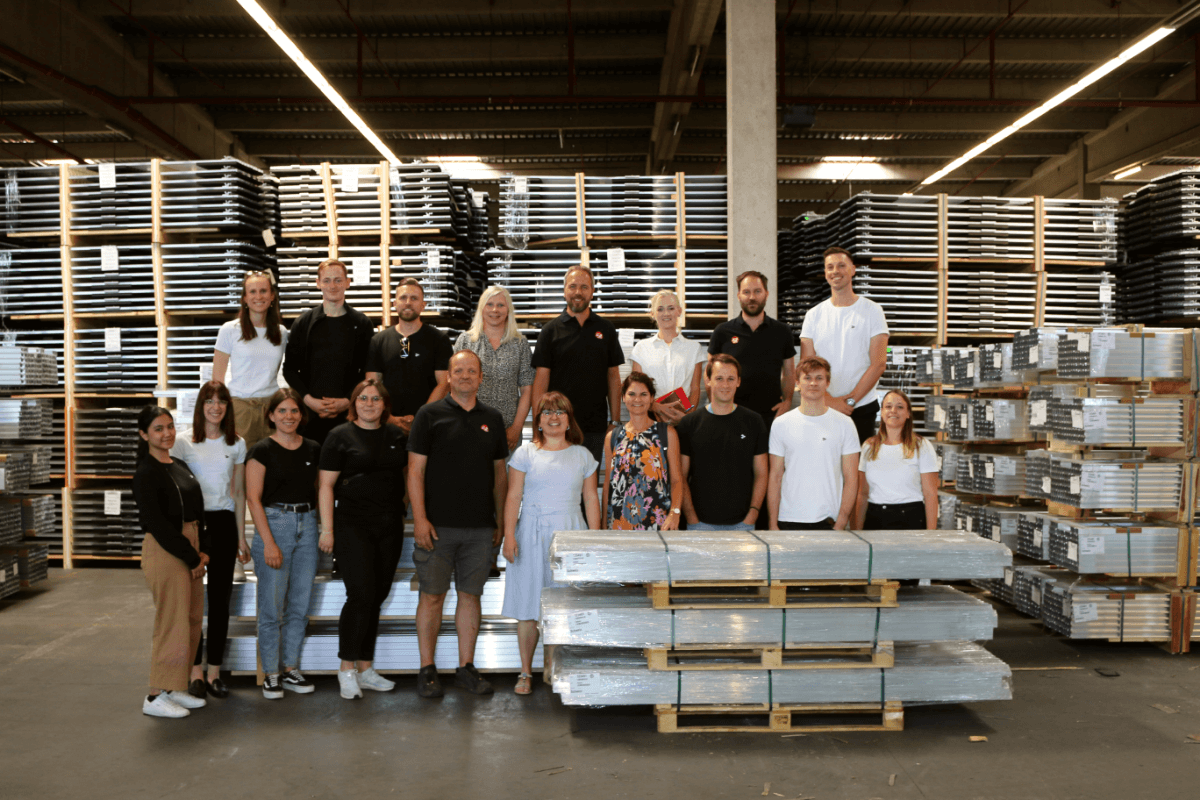
Memodo in action: training days @ K2 Systems
Approaching, going deep and getting a glimpse into the life of the manufacturer. K2 Systems organised training days for us focussing on its assembly systems and digital tools. What did we learn? And what tips did we get?
The Memodo team, more precisely our planning, product management and purchasing departments travelled to Renningen to K2 Systems. The two days of training took place with the aim of viewing the standard products and special solutions live and in colour, to learn installation techniques and to properly check out the digital tools. This way, the products not only become more tangible, but they can also be handled and explained with details and tips.
For many new colleagues of the Memodo team, this is an ideal preparation for their everyday tasks. At the same time, there is the opportunity to get to know manufacturer partners closely and to strengthen the personal connection with them.
From the warehouse to a roof sample
We reached K2 Systems along the relatively uncongested A8 highway, which took us to the idyllic Renningen, near Stuttgart. Once arrived, we visited the main warehouse, which mostly contains clamps, roof hooks and smaller parts. After visiting the video studio of K2 Systems, we drove to the warehouse for mounting rails, at a distance of about 10 km. We found ourselves in a gigantic hall which was as big as 2 football fields. Here, the company stores various mounting rails for roof systems, which are loaded every day into up to 40 trucks. K2 Systems currently has a total of 7 warehouses in Germany.
Product portfolio at a glance
K2 Systems offers photovoltaic mounting systems for various roof types and soil classes. The range includes pitched roof and flat roof systems. The mounting systems for flat roofs are suitable for surfaces such as concrete, bitumen, foils, green roofs, gravel or even trapezoidal sheet metal. For pitched roofs, K2 offers fastening components for trapezoidal sheet metal, corrugated fibre cement, roof tiles or bricks as well as sheet metal seams. Roofs can be built on at an angle of 0-45°.
Dome 6.10 Xpress in focus
There was a special training course for the Dome 6.10 system, the flat-roof all-rounder from K2. Available are the Dome 6.10 Classic and the Xpress versions. The Dome 6.10 System Xpress consists of 4 components including a pre-assembled rail. The Classic system consists of several individual parts that you can put together. With the Dome 6 system, you can set up the modules on one side (S-Dome 6) or on two sides (D-Dome 6) or in combination and at 10° or 15°.
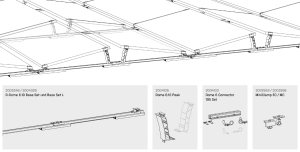
Components D-Dome 6 Xpress, © K2 Systems
With a module width of 950-1060 mm, this results in a row distance of approx. 2.3 m and an elevation angle of 10° for these systems. With a width of 1061-1170 mm, this results in a row distance of approx. 2.5 m and an angle of 9°. In addition, there must be a minimum distance of 600 mm to the roof edge.
For the double-sided elevated D-Dome 6.10 system, at least 2 elevation supports must be mounted contiguously. To ensure that the PV system is securely positioned, the roof pitch, the hight of the building and roofing are significant parameters. The Dome 6.10. Xpress can be installed in 4 assembly steps.
The Dome 6.10 system is suitable for flat roofs < 10° with foil or bitumen covering, on concrete, gravel or green roofs. Ballasted and without roof penetration, you can install the system with a roof pitch ≤ 3°. With a fixed connection via the Dome FixPro, roof pitches > 3° are permissible. Permissible module dimensions are 1448-2390 × 950-1170 × 30-50 mm (L×W×H). Clamping on the short module frame side is possible. With the D-Dome 6.10 Xpress, you can implement module sections with a length and width of 16 m each.
For the Classic version – before the thermal separation of the system – the length is 12 m and the width is 16 m. All values are automatically considered by the K2 base planning tool when you plan your project with the Dome 6 system and it generates the assembly and ballasting plan at the end.

Overview of dimensions and distances D-Dome 6 and S-Dome 6, © K2 Systems
Assemble on your own
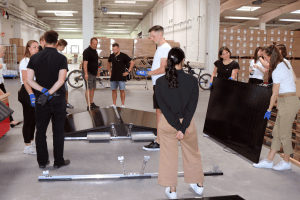
In the first step, we laid the base rail for the D-Dome 6.10 Xpress on the floor together with Rainer Burkhardt and Ronny Barner, Technical Sales at K2. It is pre-assembled and comes with a Mat S, the support elements SD, left and right, and a MidPlate. We connected 2 rails with rail connectors by means of the in-bolt technology. We inserted the connector with elongated hole into the rail, fastened it with a bolt and secured it with a splint pin.
We determined the distance between the rails using the Dome Speed Spacer. We first recorded the module length with the vertical side, then we turned the spacer and created the distance between the base rails by positioning the spacer horizontally. At this point, we inserted the MidPlates; with the D-Dome there are 2 peaks for the two-sided support of the modules.
We then ballasted with the SpeedPorter. The Porter Short / Long / X-tra Long can also be used here. We did not create a fixed connection to the roof. However, this would be possible with the Dome FixPro set. With the cable manager, we fasten the module cables directly to the substructure so that they do not come into contact with rainwater puddles. Check the whole assembly process in this video.
Memodos in training
Assembly special solution: Elevation on the trapezoidal sheet metal
Hall roofs or carports are often covered with trapezoidal sheet metal instead of bitumen or foil. If the modules are to be elevated to 10°, a combination solution is required: We covered a roof sample including several trapezoidal sheet metal tracks with the D-Dome 6 Classic system on the basis of the SpeedRail system.
To do this, we first fastened the SpeedRail bar with SpeedClips. We immediately put Ronny’s tip ─ place the two outer clips first ─ into practice. We placed the SpeedClips in such a way that the K2 logo could be read correctly. Every 4th SpeedClip should be placed the other way round and at the end to ensure that the rail cannot slip out.
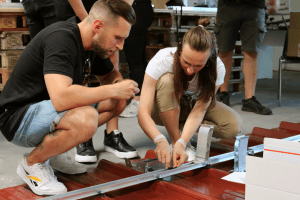
Silvio and Magdalena set the peaks
The Mat S support pads, which are usually included in the D-Dome 6 Classic, can be omitted in this special application, as the SpeedRail bar is securely fastened to the trapezoidal sheet with the SpeedClips. By using the Domes 6.10 SD and the Peaks, an elevation of an additional 10° can be achieved on a trapezoidal sheet that has a roof pitch < 10°. The Domes 6.10 SD and the Peaks were fixed to the SpeedRail bar using the insert nut and the cylinder head screw. This special solution cannot yet be planned in the digital tool K2 Base. We needed these parts for this purpose:
This is how you arrive at this solution
First, you design a flat roof with a foil covering and the D-Dome 6.10 Classic system in the K2 Base. Secondly, you reduce the maximum block size to 8.8 m and save the project. The project can now be downloaded and sent to your Memodo contact person together with the information of the trapezoidal sheet (sheet thickness, total height incl. groove, groove distance and material). K2 then calculates the module sections and sends us the adjusted parts list and the structural analysis for the system, which we forward to you.
Digital Tools: DocuApp + Base
At the very start of the project, the data can be entered directly into the K2 DocuApp on site. This way, the preliminary design process can be done, the customer verification can be carried out and the data can either be transferred directly to the planning tool K2 Base or you can send your project data to your Memodo contact person for further project development.
The further course of the project can be documented in the app with data regarding the storage system, the inverter and the modules. The customer can then accept the system by signing it right on the mobile phone/tablet. The complete documentation can be downloaded as a PDF and then stored. In the DocuApp, instructions for a market master data registration can also be downloaded for the system owner. During the training days, we followed the process.
Planning, planning, planning
Especially for larger systems, planning support can’t do any harm. With us, you will have your personal contact person from the sales or the order management department. In the first step, you will be provided with a checklist which you fill out with the project data. This is then sent back to your contact person. Our planning department will plan the project for you. The project report including a list of articles will be sent to you. You can then check it and order the articles accordingly.
Conclusion
Training courses are good and important, especially when they are as detailed as the K2 ones. A practical assembly process under experienced guidance, selected theory and an introduction into the company’s world were provided. At K2 Systems we were on site for 2 days.
Part of the training focused on the Dome 6.10 system, which we also set up as a special solution for the trapezoidal sheet. We also had some practice with the digital products K2 Docu App and K2 Base and learned how they can make the installer’s life even easier. Those who want to explore more and need more tips on the installation and planning process can access the K2 Training video platform.
In summary:
- We were on site at K2 Systems with our planning, product management and purchasing teams for training days.
- The topics were: Deepening product knowledge and assembly skills, getting to know digital tools better and gaining deep insights into the company.
- Among other things, our team installed the Dome 6.10 system as a special solution for trapezoidal sheet metal and the SingleRail system on a tiled roof, including flexing the tiles.